
Today we will add actions to our Ball. First we need to reload our program from our saved file. You should then be back where we left off. If you can’t see the list of objects on the left, use the plus sign to the side of objects to expand it and then double click on objBall to bring up the properties.

You should then have a window:

For the ball we will use the Add Event and choose Create.
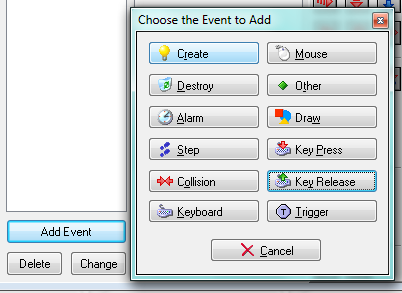 |
| Create |
Next we will drag the move fixed icon from Move to Actions to bring up the action properties and add move fixed to the ball’s actions.
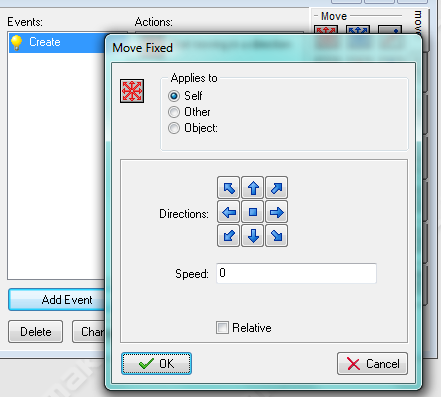
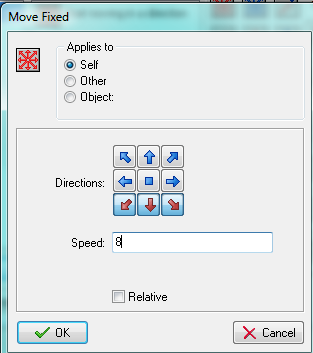
We leave it set to Self and choose all the down arrows to make the ball start moving down. The speed you then enter will control how fast the ball will start moving. (The larger the number the faster the ball goes). I filled in a speed of 8.
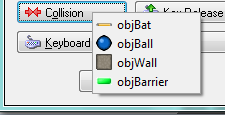
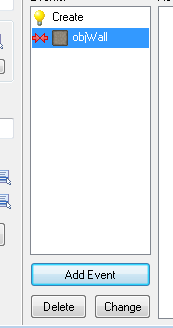
Next we want to set up so that if the ball hits a wall it will bounce. (We will also do this with the bat next). We now want to choose Add Event – Collision.

Collision will bring up the list of objects that the ball can collide with. Notice Ball is listed (you can add more than one ball to the room and make them react to each other…) We have one ball for now and are working on interaction between the Ball and the Wall so we will choose objWall.
You can now see it listed in the events and selected. When the ball collides with the wall, we want it to bounce off.
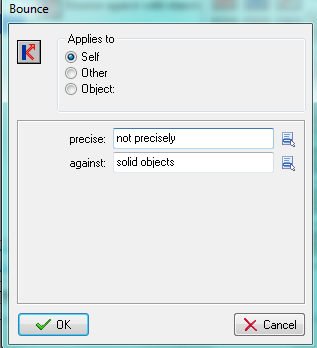
So we will drag the Bounce Icon (from the right) into actions.

Leave the default settings so that the ball will bounce randomly and click OK.
Now we will do the same thing for the Bat. Choosing to add a collision event and choosing Bat to the Events. Drag Move Fixed to the Actions and choose to move the ball up or down when it hits the bat choosing all up and down directions like below.

Also set the speed. I chose 8. Finally we will do this again for the Barrier. With the Barrier we will just set the ball to move down after hitting a barrier. I am setting the speed to 8, but for a level of difficulty later you could modify the barrier to cause the ball to speed up when it bounces off a barrier by choosing the relative checkbox (The larger the number in this the faster it will speed up, relative works by adding the new number to the old to get the speed – so if you start with 8 and have a barrier set to 8 and relative, the first barrier hit will set the speed to 16, and the second to 24 and so on.)

Next we want to make the barrier disappear when it collides withe ball. So leaving collide with barrier highlighted in events. We will select the Main1 tab on the right.

Drag the Destroy Instance Icon below into the actions window. Select the Other option under applies to so that the barrier will be destroyed and not the ball and click OK.

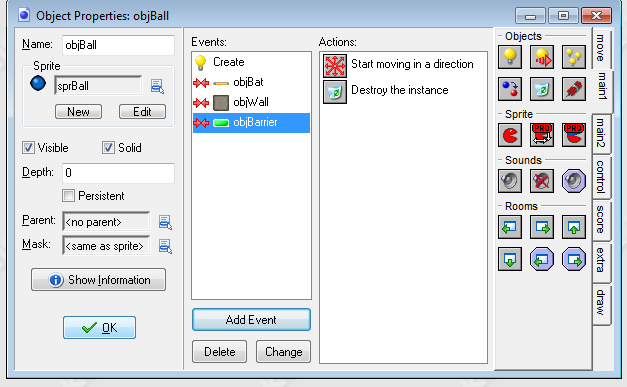
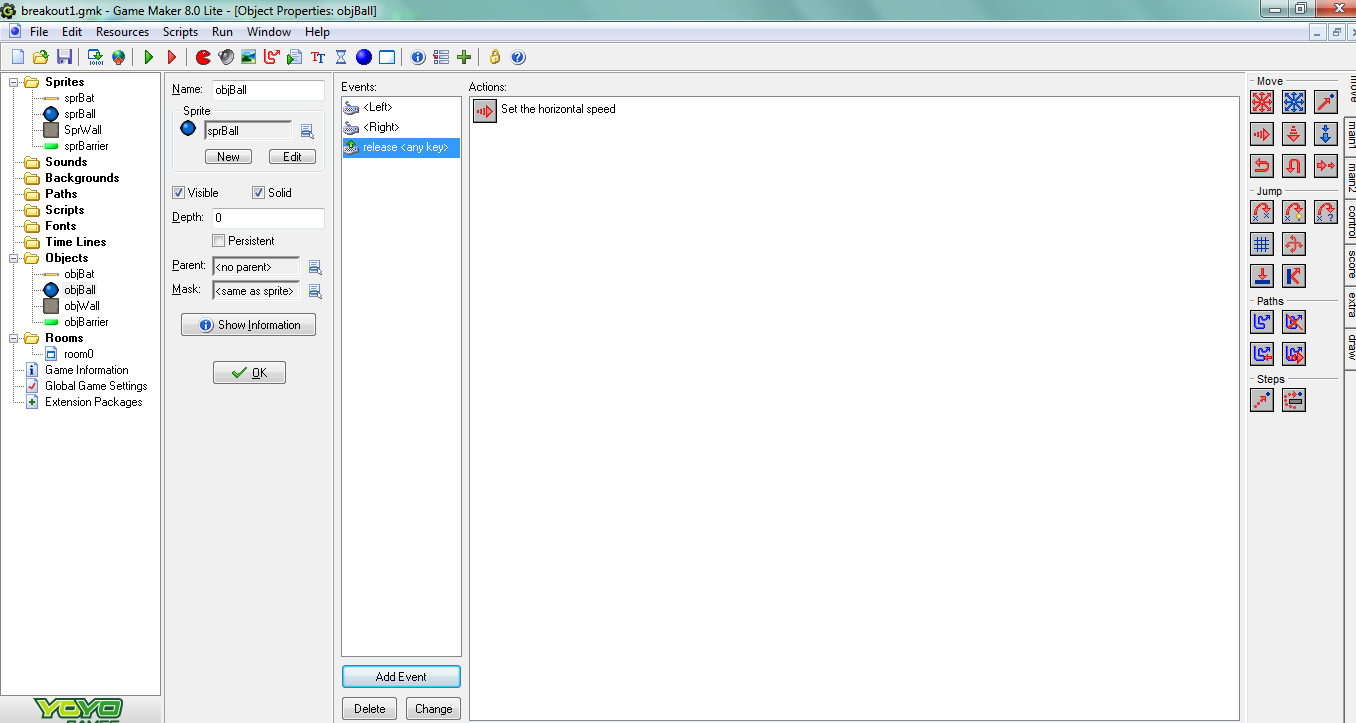
Our Ball Properties will look like:
Now choose OK, Save our current version, and give it a test run. Tomorrow we’ll finish up our basic version by adding a score and sharing our version with our friends.

 I am a SAHM/WAHM of three boys ranging in age from 13 to 29. We are working on saving enough for college at the same time as dealing with school and our older independent kids. I author a few blogs, including http://teched4kids.com. I have in the past taught computer information technology classes for the local university and taught workshops for kid's in technology education besides being the Kentucky State FIRST LEGO League Championship Coordinator from 2005 to 2008. I now work as a computer consultant, run a handmade home business, and am available for workshops. Life here is always an adventure!

Hi and thanks for taking the time to explain the terminlogy to the noobs!
Thanks a lot for taking the time to describe the terminlogy to the inexperienced persons!