
Today we are going to move on to creating the object to go with our sprites (graphics). The object will later be associated with actions. (Like making the ball start moving.
Objects are one of the choices on the left. If you have saved last time and are coming back you will need to reload our file from Part 2.

We will now right click on Objects and choose Create Object.
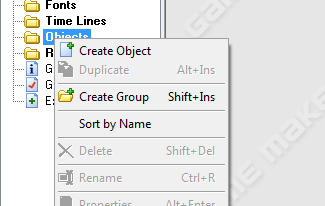
We will need to create four objects:
- ObjBall
- ObjBat
- ObjWall
- ObjBarrier
To stick with naming conventions we are naming each object with a name that starts with Obj.
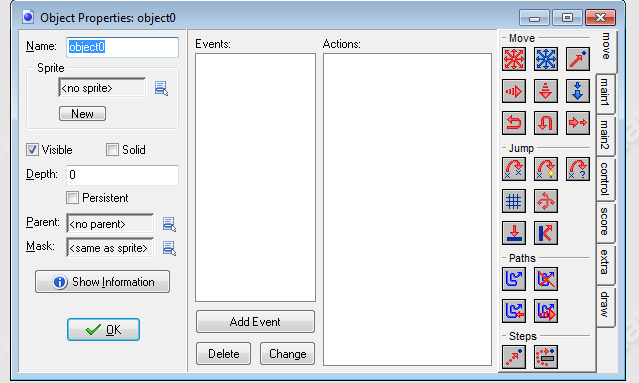
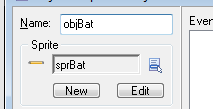
After entering a name we need to associate a Sprite with the Object. So for the objBat object we will choose the sprBat sprite to go with.

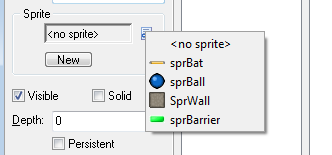
After the sprite is associated you will see the name and graphic…..
We also want these objects to all be solid objects so that they will not pass through each other. (Ball won’t pass through the Bat and so on….) So choose the Solid checkbox.

Checked:

Once the name, sprite, and Solid are taken care of Choose OK.


and go on to create the additional three objects:

After all four objects are created you will see the above Objects in your directory. Now save your projects for tomorrow when we will go on to create the Room and add our objects to the room.

 I am a SAHM/WAHM of three boys ranging in age from 13 to 29. We are working on saving enough for college at the same time as dealing with school and our older independent kids. I author a few blogs, including http://teched4kids.com. I have in the past taught computer information technology classes for the local university and taught workshops for kid's in technology education besides being the Kentucky State FIRST LEGO League Championship Coordinator from 2005 to 2008. I now work as a computer consultant, run a handmade home business, and am available for workshops. Life here is always an adventure!

Following you back 🙂
http://wilsonlite.blogspot.com
Thanks for the follow and back at you.
Jen
Moms Online Garage Sale
Thanks for the follow. Following you back!
I would really like to thank you so much for your work you have made in writing this article. I am hoping the same most reliable job by you later on too.
Many thanks for trying to describe the terminlogy for the noobs!